
Hi Stampers. A while back I shared with you a few cards made with the floating frame technique and shared the video on how I made these cards. Today I get to share them with you! If you want to see the other cards you can view them HERE. (That post has step by step photos and uses the It Starts With Art stamp set.)

For these cards, I started with Real Red as my main color and added Blueberry Bushel and Daffodil Delight with an accent of Whisper White.

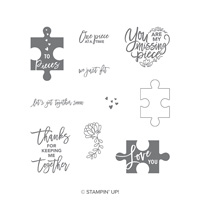
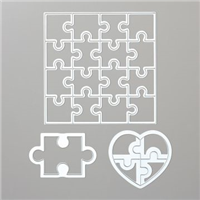
To cut out the center and make the frame – for the two cards – I used the stitched rectangle dies. I used the Love You To Pieces stamp set and the Puzzle Pieces Dies for these cards.

These cards are made using Glad Press & Seal. I found mine to be a bit too sticky, so I patted it with my hands (letting the oils from my hands transfer to the press & seal) making it less sticky.

These cards would be great to use for Autism Awareness or just about any occasion or even just to bring a smile to the recipient.

Don’t forget to stamp the inside of your cards for a complete look! You can see how I made these cards in the following video:
If you live in the United States and would like to shop with me you can follow any of the photo links below to get to my online store. When you place your order, don’t forget to use this months Mystery Hostess code – from the bar on the right – to earn this months Customer Appreciation PDF Tutorial (with a qualifying order)!
If you need help with how to use the host code you can find the answer here. If you would like to join me for some classes, clubs or events make sure to visit the events page or sign up for my newsletter so you will never miss out again.
Thank you for visiting please take the time to say hello and leave a comment.
These are the supplies I used:
click on the picture to be taken to my store to purchase


This month’s PDF is all about the Harvest Hellos Bundle. This PDF includes all the instructions to create six adorable cards – I’ve even included a few simple fancy folds!.
All orders of $30 and above (before tax and shipping) placed in my online store using the Hostess Code QC424PBZ, will be emailed the Customer Appreciation PDF tutorial within 48 hours.

View my YouTube video where I show you how to assemble two cards and five Santa Suit projects. If you would like to recreate the projects from this class, I’ve created a PDF that includes all of the supplies, measurements and step by step Instructions that you can qualify for and receive by email. Just place a $40 order in my online store and use Host Code: JN9CCM3K
View the #elfie & Santa Suit YouTube video HERE
PLEASE NOTE, if your order is over $150 before tax and shipping DO NOT enter the Hostess Code and you will receive all the Stampin’ rewards you earned on your order AND the Customer Appreciation PDF tutorial.
 Don’t forget to check out the “stock up and save” – DSP sale!
If you enjoyed this post, please be sure to . . .
- Join me on Monday’s at 2:30 PM (MT) on my Facebook page for Facebook LIVE.
- Receive a FREE PDF tutorial when you subscribe to my monthly newsletter (exclusive offers) & daily blog updates here.
- Earn up to a $45 shopping spree with my Royalty Rewards Program.
- Check out the clearance rack and save up to 70%.
- Save 10% on coordinating product bundles!
- The $99 Starter Kit is the best deal of ALL! Discounts & benefits here.
- Visit my gallery for paper crafting ideas.
- Place a $30 (or more) order and receive my FREE Customer Appreciation PDF Tutorial.
- Join my Online Classes to create some fabulous projects using Stampin’ Up! products with great layouts, fun folds & techniques you won’t want to miss
- Follow me on Pinterest.
- Subscribe to my YouTube paper crafting video tutorials.


