Hi Stampers. Welcome to the November, 2018 Blog Hop with Stampin’ Pretty Pals. Holiday cards are done. It’s time to start on gifts and gift wrap. Let the Stampin’ Pretty Pals inspire you with “Anything But A Card” today.
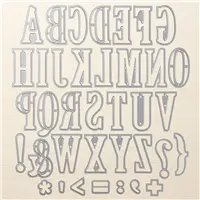
You may be starting the hop here or coming from a previous Pal’s blog. Either way, you’ve come to the right place. You’ll find the the full line-up below to help you move, or “hop” along from Pal to Pal. My project is a Christmas Gift Box that say’s HO HO HO using the large letters framelit dies and Lindor Truffles (could also be Ferrero Rocher or any other round covered candies about that size).

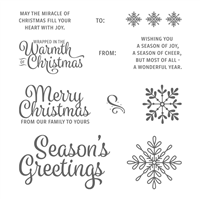
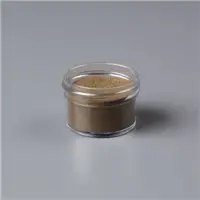
The box is made out of Real Red CS in three pieces – top, bottom and insert. For the top of the box I cut a piece of Real Red CS 4 1/8″ x 10 1/8″. This piece was scored at 3/4″ from all sides and burnished with a bone folder. Then I snipped the corners and adhered the tabs to the adjacent side. The top of the box is decorated with 8 1/4″ x 2 1/4″ layer of Basic Black CS followed by a 8″ x 2″ layer of Real Red CS. Using the Snowflake Sentiments stamps set, I stamped the greeting and snowflakes in Versamark ink. (Don’t forget to use the embossing buddy to prevent the powder from sticking where you don’t want it). I then added Gold Stampin’ Emboss Powder, tapped off the excess and heated with the heat tool.

The bottom of the box was made using a 5″ x 11″ piece of Real Red CS, scored at 1 1/4″ from each for the four sides. I snipped the corners and adhered the tabs to the adjacent sides. (Watch the video below to see how I made this gift box).

The insert was created out of a piece of Real Red CS 3 3/8″ x 9 3/8″, scored at 1/2″ from each of the four sides. I die cut 3 “H” letters out of Gold Foil Paper using the Large Letters Framelit dies and the Big Shot. The “O” letters were cut out of Gold Foil Paper using two of the circle dies from the Layering Circles Framelit Dies and the Big Shot. I placed the letters onto the insert to determine where they would go and made marks with a pencil where each “O” would be. Then using the smaller of the two circle dies used to make the “O”, I cut a whole in the insert where each “O” will be. Each letter was then glued in place using liquid adhesive. I then snipped the corners and adhered the tabs to the adjacent sides. The Lindor Truffles are held in place using a glue dot on each end and adhering behind each “O” in the insert. The insert was placed inside the box (no adhesive needed).
Here is a video tutorial on the making of this gift box:
Thank you for stopping by my blog and letting me share my ideas with you. Get more inspiration using the Blog Hop Line-up below. My fellow Pals are excited to show you what they’ve created. Don’t forget to show us some love by commenting on our creations.
Mark your calendars for Wednesday, December 12, 2018 for the next Pals Blog Hop. It will be a glitzy affair with All That Sparkles and Shines. Don’t miss the fun.
Blog Hop Line-up:
- Mary Fish at Stampin’ Pretty
- Wendy Klein at Doggone Delightful Stampin’
- Linda Suarez at All Night Stamping
- Su Mohr at Aromas And Art
- Lisa Ann Bernard at Queen B Creations <— You are here
- Maggie Mata at Maggie Made Cards
- Rae Harper-Burnet at Wild West Paper Arts
- Denise Hoepfner at The Mountain Magpie
- Peggy Noe at Pretty Paper Cards
- Beth McCullough at Stamping Mom
- Jennifer Michalski at Stamping Serenity
- Lori Pinto at LollyPop Paper and Ink
- Sandra Conner at Pretty Provisions
- Leah O’Brien at Stamping By The Bay
- Jackie Beers at Blue Line Stamping
- Mary Hanson at Up North Stampin’
- Katy McGloin at Just Fun Stamping
- Tricia Chuba at ButterDish Designs
- Pamela Sadler at Stampin Pink Rose
These are the supplies I used:
click on the picture to be taken to my store to purchase


This is so elegant looking. Thank you for a video!
Thank you so much for your nice comment.
What?!?!?!? This is so. amazing and elegant and definitely a WOW gift for someone! Thank you for sharing your instructions!
Thanks, Denise. It makes me happy that so many people like this little gift box.
Lisa, this is such a fun and festive box! I love how it reminds me of Santa and then the wow factor when you open it up and see the inside is amazing. Thanks for sharing 🙂
Thank you, Jennifer, that’s so nice of you to say.
Oh my gosh Lisa, this is so professional! You did an amazing job. And, thanks for the instructions!
Thank you so much – you comment really made me smile.
Oooh, I love this! I think this would be a perfect gift to give to coworkers! You’re giving me ideas!
Thank you, Linda. I’m glad you like it. I hope you made some for your co-workers.
This is a WOW! Christmas box for sure! Thank you so much for all of the smiles you will bring to people this holiday season ^_^
Thank you for your kind words
Super Christmas gift box Lisa. I feel a CASE coming on.
Yippee! I’m happy to inspire you!
replay video and this is wonderful!! Was the size 5 x 11 or 5 x 11 1/4?
It is 5″ x 11″.