
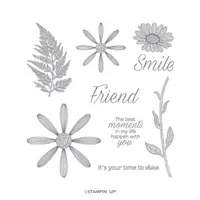
Hi Stampers. I have another Daisy Lane card for you today. I’ve been in love with this set lately, its a clean and simple set that makes very sweet cards. Another thing I’ve been in love with lately is this layout using the Stitched Layering Labels Dies. Another card I did with this stamp set, dies and layout has been on fire on Pinterest! You can see it HERE.

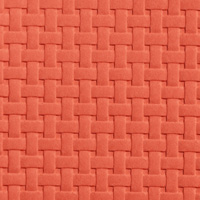
This card starts with a Thick Whisper White card base – 8-1/2″ x 5-1/2″, scored at 4-1/4″. Next up is a 5-1/4″ x 4″ layer of Lovely Lipstick CS. I used the Basket Weave embossing folder to dry emboss it and then attached it to the card base using snail adhesive. Using a die cutting machine and the Stitched Nested Label dies to cut labels out of Whisper White CS. Onto the smallest stitched label I stamped the word “smile” from the Daisy Lane stamp set in Lovely Lipstick ink. The second (larger) label I placed onto the basket weave background vertically and cut off the top (making it look like a banner).

Using Lovely Lipstick ink, I stamped one small and one large daisy onto Lovely Lipstick CS. Next, I used the same stamps to stamp one large and one small daisy in Lovely Lipstick ink onto Whisper White CS. I punched out these daisies using the coordinating Daisy Punch and Medium Daisy Punch. The are layered on top of each other and attached using mini glue dots. The flowers are then attached to the card front using mini glue dots and a clear Faceted Gem was placed in the center to finish it off.

For the interior of the card, I chose to use a 5-1/4″ x 4″ Lovely Lipstick CS layer, followed by a 5″ x 3-3/4″ layer of Whisper White CS. Before adhering the layers to the inside, I stamped two of the small daisies in Lovely Lipstick ink in the upper right and the lower left corner. I let them hang off the edge, so there will be more room to write my message on the inside. The layers are attached to the inside of the card are attached using snail adhesive. This card is sure to make someone “smile”. 🙂

If you live in the United States and would like to shop with me you can follow any of the photo links below to get to my online store. When you place your order, don’t forget to use this months Mystery Hostess code – from the bar on the right – for your chance to be this months hostess and earn FREE hostess rewards!
If you need help with how to use the host code you can find the answer here. If you would like to join me for some classes, clubs or events make sure to visit the events page or sign up for my newsletter so you will never miss out again.
Thank you for visiting please take the time to say hello and leave a comment.
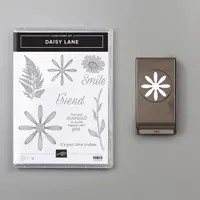
These are the supplies I used:
click on the picture to be taken to my store to purchase


If you enjoyed this post, please be sure to . . .
- Join me on Monday’s at 2:30 PM (MT) on my Facebook page for Facebook LIVE.
- Receive a FREE PDF tutorial when you subscribe to my monthly newsletter (exclusive offers) & daily blog updates here.
- Earn up to a $45 shopping spree with my Royalty Rewards Program.
- Check out the clearance rack and save up to 70%.
- Save 10% on coordinating product bundles!
- The $99 Starter Kit is the best deal of ALL! Discounts & benefits here.
- Visit my gallery for paper crafting ideas.
- Place an order and join my Queen B Creations VIP club for many more FREE PDF Project and Tips.
- Join my Online Classes to create some fabulous projects using Stampin’ Up! products with great layouts, fun folds & techniques you won’t want to miss
- Follow me on Pinterest.
- Subscribe to my YouTube paper crafting video tutorials.


very prettycard!
Thank you, Rita
Awesome, can’t wait to get well and make this card.
Fun! You should share what you make on my Business Facebook page!
Lovely. I especially like the two-tone daisies. I will have to try that next time I’m stamping.
Thank you. I hope you do give it a try!