
Hi Stampers. Today is a quick post just to show you a bookmark that we made at my Annual Catalog launch back in June. It was on my mind, because I’m planning the 2019 Holiday Catalog Launch for the beginning of September. 🙂 I hope you can come!

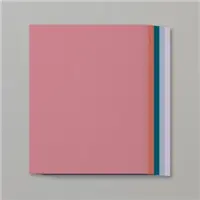
This bookmark showcases the 2019-2021 in-colors. In order to have the printed color names and my website address, I created it on the computer and printed it on the Whisper White CS using my computer printer. They were then cut into 1-3/4″ strips (on the right, the left side is 2″ with a 2-1/4″ base and a tad too wide for the tag topper punch).

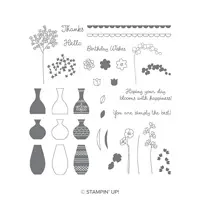
Next, I used the in-color inks and the Varied Vases stamp set to stamp the flowers. On one bookmark on the left, I just stamped the outline of the flower. For the bookmark on the right, I stamped the outline and the fill stamps. These are stamped full strength for both. At the catalog launch, we stamped off once for the fill stamps, much better effect.
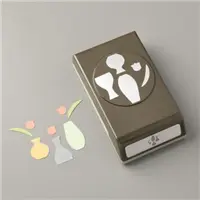
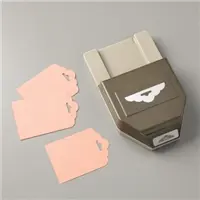
I used the vases builder punch to punch the vases out of the in-color cardstock and adhered them to the Whisper White layer using multipurpose liquid glue. Next, I cut Pretty Peacock CS into strips that were 8-1/2″ x 2″ and used the Scalloped Tag Topper Punch to punch the top. The Whisper White layer is adhered to the Pretty Peacock CS using snail adhesive.

The finishing touch was a 4″ piece of ribbon looped through the top hole on the bookmark. This bookmark is great to use in the catalog to hold your spot, but also allows gives you a true example of the new in-color inks and cardstocks.
If you live in the United States and would like to shop with me you can follow any of the photo links below to get to my online store. When you place your order, don’t forget to use this months Mystery Hostess code – from the bar on the right – for your chance to be this months hostess and earn FREE hostess rewards!
If you need help with how to use the host code you can find the answer here. If you would like to join me for some classes, clubs or events make sure to visit the events page or sign up for my newsletter so you will never miss out again.
Thank you for visiting please take the time to say hello and leave a comment.
These are the supplies I used:
click on the picture to be taken to my store to purchase


If you enjoyed this post, please be sure to . . .
- Join me on Monday’s at 2:30 PM (MT) on my Facebook page for Facebook LIVE.
- Receive a FREE PDF tutorial when you subscribe to my monthly newsletter (exclusive offers) & daily blog updates here.
- Earn up to a $45 shopping spree with my Royalty Rewards Program.
- Check out the clearance rack and save up to 70%.
- Save 10% on coordinating product bundles!
- The $99 Starter Kit is the best deal of ALL! Discounts & benefits here.
- Visit my gallery for paper crafting ideas.
- Place an order and join my Queen B Creations VIP club for many more FREE PDF Project and Tips.
- Join my Online Classes to create some fabulous projects using Stampin’ Up! products with great layouts, fun folds & techniques you won’t want to miss
- Follow me on Pinterest.
- Subscribe to my YouTube paper crafting video tutorials.


What a good idea!
Thank you, Melinda. I miss you! Hope you are doing well.