
Hi Stampers. Do you like cards that are just a little different? I sure do! I’ve seen a few cards made with mini magnets and couldn’t wait to give it a try! The idea is the magnet makes something slide across the card and you can even take it off. The Ride With Me truck seemed like the perfect fit! This card really makes more sense when you see it, so I did a Facebook Live video (see that video HERE).

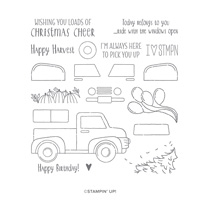
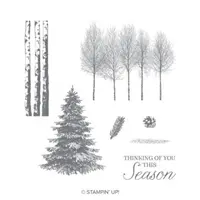
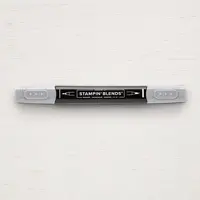
I started with a Shaded Spruce card base and stamped the trees from Winter Woods onto a Whisper White layer in Shaded Spruce ink. I then stamped the truck onto Cherry Cobbler CS and cut it out. The window was cut out using an xacto knife and then backed with a tiny piece of Window Sheet. The bumper and rims were colored in with a silver gel pen and the tires with a Light Basic Black Stampin’ Blend. I used the Adhesive Strips to create a rectangle section behind the Whisper White layer where I want the truck to slide back and forth. (see the video for more information). The second magnet was adhered to the back of the truck. (You can order the mini magnets HERE).

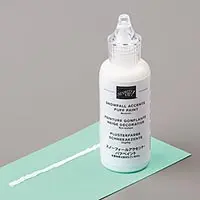
A little puff paint added to the Whisper White layer over the trees gives the look of snow. The sentiment was stamped on a strip of Whisper White CS and attached to the back of the truck. You can pull on this flag to make the truck move back and forth.

I used another layer of Whisper White for the interior of the card. I inked the tree once and stamped it twice. That’s how I got the two shades of green. 🙂 The FB Live video is now on my YouTube channel. Be sure to subscribe to my YouTube channel and turn on notifications by clicking on the small bell next to the “subscribe” button.
Video Tutorial:
If you live in the United States and would like to shop with me you can follow any of the photo links below to get to my online store. When you place your order, don’t forget to use this months Mystery Hostess code – from the bar on the right – to earn this months Customer Appreciation PDF Tutorial (with a qualifying order)!
If you need help with how to use the host code you can find the answer here. If you would like to join me for some classes, clubs or events make sure to visit the events page or sign up for my newsletter so you will never miss out again.
Thank you for visiting please take the time to say hello and leave a comment.
These are the supplies I used:
click on the picture to be taken to my store to purchase


This month’s PDF is all about the Ride with Me Bundle. This PDF includes all the instructions to create six adorable cards – I’ve even included a few simple fancy folds!.
All orders of $30 and above (before tax and shipping) placed in my online store using the Hostess Code RDSKZUR3, will be emailed the Customer Appreciation PDF tutorial within 48 hours.
PLEASE NOTE, if your order is over $150 before tax and shipping DO NOT enter the Hostess Code and you will receive all the Stampin’ rewards you earned on your order AND the Customer Appreciation PDF tutorial.
If you enjoyed this post, please be sure to . . .
- Join me on Monday’s at 2:30 PM (MT) on my Facebook page for Facebook LIVE.
- Receive a FREE PDF tutorial when you subscribe to my monthly newsletter (exclusive offers) & daily blog updates here.
- Earn up to a $45 shopping spree with my Royalty Rewards Program.
- Check out the clearance rack and save up to 70%.
- Save 10% on coordinating product bundles!
- The $99 Starter Kit is the best deal of ALL! Discounts & benefits here.
- Visit my gallery for paper crafting ideas.
- Place a $30 (or more) order and receive my FREE Customer Appreciation PDF Tutorial.
- Join my Online Classes to create some fabulous projects using Stampin’ Up! products with great layouts, fun folds & techniques you won’t want to miss
- Follow me on Pinterest.
- Subscribe to my YouTube paper crafting video tutorials.


