
Hi Stampers
Welcome to the Pals’ Blog Hop! We’re so glad you’re here because it’s “Time to Sale-A-Brate”! We’re showcasing our favorite new products from 2020 Sale-A-Bration brochure. You may be starting the hop here or coming from a previous Pal’s blog. Either way, you’ve come to the right place. You’ll find the full line-up below to help you move, or “hop” along from Pal to Pal.

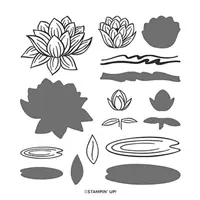
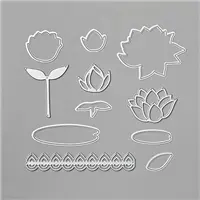
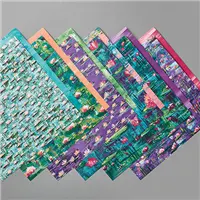
My project is a birthday card using the Lovely Lily Pad stamp set (level 1 SAB gift), Lily Pad Dies (level 2 SAB gift) and the Lily Impressions Designer Series Paper (level 1 SAB gift). <— Did you catch all that? Three FREE items! A stamp set, dies AND DSP – all for FREE! I just love FREE stuff! All this FREE stuff coordinates to make a BEAUTIFUL fancy fold birthday card. I don’t know the name of this fold – the card base uses a dutch fold but then there is an inner card, too. I had saved a photo of a card folded like this a while back – it’s not watermarked and I can’t find it again – go figure, right!?!

I had no instructions, so I had to kind of “wing it”. The Coastal Cabana dutch fold card base was easy – That’s 5-1/2″ x 8-1/2″, scored at 2-1/8″ from each side and then folded to meet in the middle in the front. Next I cut the DSP to 5-1/4″ x 3-3/4″ and die cut a circle from the center, cut it in half down the center and attached each half to the sides in the front. I repeated that process and adhered to the inside of the card front – so both sides of the “flaps” are covered. Then I took a slightly smaller circle and cut out the 1/2 circle from each end of the card base – so now I had my hole from outside to inside of card.

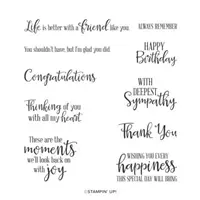
The inside of the card has a smaller card. This Bermuda Bay card base is 5″ x 7-1/2″, scored at 3-3/4″. This card is layered in DSP 4-3/4″ x 3-1/2″. Don’t you just LOVE that DSP – flowers on one side and then semi plain on the back. I made a banner of a 2″ strip of Blushing Bride and a 1-1/2″ strip of DSP. I stamped the sentiment on Whisper White (from the Peaceful Moments stamp set) in Bermuda Bay ink. This was then punched out using the 2″ circle punch and backed with a piece of Coastal Cabana CS punched out with the 2-1/4″ circle punch. These were attached to the card so that it was centered in the hole cut in the front.

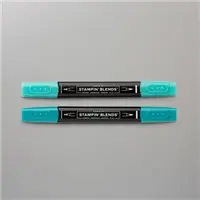
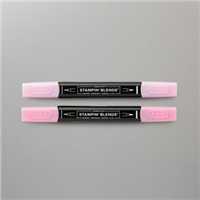
I stamped a few lilies and a few leaves, die cut them using the Lily Dies and colored them with Stampin’ Blends and tucked them in under the circles. A few additional die cuts from the Lily Dies are attached inside the flaps. Inside the second card is a 3-1/2″ x 4-3/4″ layer of Whisper White that was stamped with a sentiment (also from the Peaceful Moments stamp set) in Bermuda Bay ink and a 1/2″ strip of DSP was adhered across the bottom of this layer.

To finish off the card, I wrapped a ribbon around the closed card (adhered it with a few glue dots) and tied a bow in the front. I’m pretty happy with how it came out. I hope you are, too. Leave me a comment and let me know what you think.
More inspiration awaits! Use the Blog Hop Line-up below to visit the rest of this month’s Design Team. My fellow Pals are excited to show you what they’ve created! Don’t forget to show us some love by commenting on our creations. Mark your calendars for Wednesday, February 12th, for our Art From The Heart blog hop when our Design Team showcase projects made from the heart for any occasion. Don’t miss the fun!
Pals Blog Hop Line-Up
- Mary Fish at Stampin’ Pretty!
- Su Mohr at Aromas And Art
- Jen Roque at Stamp Camp with Jen
- Denise Hoepfner at The Mountain Magpie
- Karen Hallam at Karen’s Stamping Habit
- Tricia Chuba at ButterDish Designs
- Linda Suarez at Lucky Dog Stamper
- Mary Hanson at Up North Stampin’
- Peggy Noe at Pretty Paper Cards
- Lori Pinto at LollyPop Paper and Ink
- Jackie Beers at Blue Line Stamping
- Jennifer Michalski at Stamping Serenity
- Debra Simonis at Deb’s Stampin’ Grounds
- Lisa Ann Bernard at Queen B Creations <—- you are here
- Beth McCullough at Stamping Mom
- Stesha Bloodhart at Stampin’ Hoot!
- Katy McGloin at Just Fun Stamping
- Lynn Kolcun at Avery’s Owlery
- Leah O’Brien at Ink, Paper, Stamps, Oh My!
- Debbie Mageed at Secrets to Stamping
- Sue Jackson at Just Peachy Stamping
- Pamela Sadler at Stampin Pink Rose
If you live in the United States (do not already work with another demo) and would like to shop with me you can follow any of the photo links below to get to my online store. When you place your order, don’t forget to use this months Hostess code – from the bar on the right.
If you need help with how to use the host code you can find the answer here. If you would like to join me for some classes, clubs or events make sure to visit the events page or sign up for my newsletter so you will never miss out again.
Thank you for visiting please take the time to say hello and leave a comment.
These are the supplies I used:
click on the picture to be taken to my store to purchase





Oh My!! A WOW card for sure! It is gorgeous.
*blush* Thanks, Jackie!
Wow! That is a fabulous card!
Thanks so much.
Wow! What an amazing card! You did a great job, it’s gorgeous!
I appreciate your sweet comments.
What a clever fun-fold, Lisa Ann! I couldn’t stop looking at it!
Thank you. It was so fun to make!
WOW! Such a gorgeous card.
Thank you, Tricia.
Lisa, I LOVE this card! Lots of pretty panels to admire! Have already pinned for a future CASE (I hope, LOL)!!
Thanks, Katy. Very cool. Can’t wait to see what you create.
Fabulous card. I always love a fancy fold.
Me too, it’s it fun?!?
This card is so cool – I’ve never seen a fancy fold like it! Beautiful coordination of products!
Thank you. Coordination is my favorite part of Stampin’ Up!
What a great fun fold card! Love all of the wonderful details, which really showcase these products.
Thank you. I love how it was made almost entirely of freebies!
Wow Lisa! You created a new kind of fun fold! It’s a beautiful card and I’d love to case it if you don’t mind? Great job!
Thank you. I saw it somewhere, but now can’t find it again…. 🙂
Awesome! A real WOW card!
Thank you so much..
great card. The lily bundle was my favorite in the catalog.
Thank you. I wasn’t so sure at first, but it grew on me. 🙂