
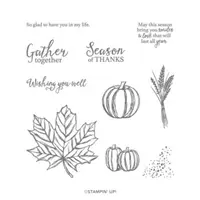
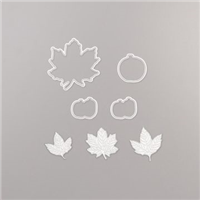
Hi Stampers, welcome back for another Stamping Friends Blog Hop. My card today is a buckle fold card using the Gather Together stamp set and the Gathered Leaves Dies. For today’s hop we are celebrating Autumn / Fall. There are many fun and create ideas on our hop, so don’t miss any. I have provided a blog hop line up below to help you see them all.

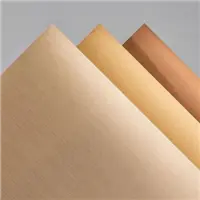
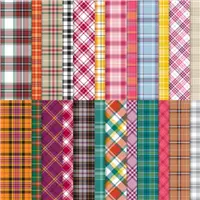
My card is CASEd from fellow demo, Cindy Brumbaugh, she made a similar card in 2019. I’ve updated it using products from the 2020 catalogs. The card base is 8-1/2″ x 4-1/4″, scored at 5-1/2″. I decorated the front of the card with a 2-3/4″ x 4″ layer of Brushed Metallic cardstock, followed by a 2-1/2″ x 3-3/4″ layer of Plaid Tidings DSP.
Stampin’ Tip: Cut the leaves out of the center of the Brushed Metallic cardstock before adhering it to the card. After you adhere the DSP, you won’t be able to tell and it helps you get the most out of your product.

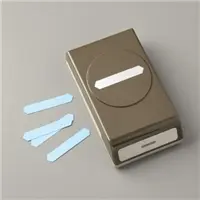
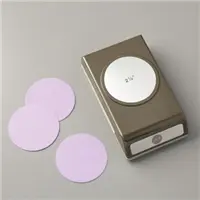
Next, I used the classic label punch to punch a slot in the center of the card front. (This will be where the belt will tuck into.) The focal point, of the leaves, is assembled and glued onto a 2-1/4″ circle. Then the circle is adhered to the front of the card by using Stampin’ Seal on the left side of the “slot” only. (So the belt can tuck underneath.)

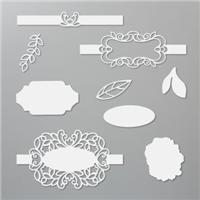
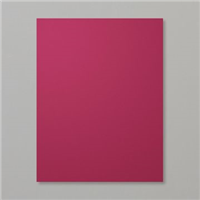
The largest leaf, from the Gather Together stamp set, was stamped onto a 3″ square of Merry Merlot CS in Merry Merlot ink and die cut using the Gathered Leaves Dies. The metallic leaves are die cut (and embossed at the same time) using the smaller leaves from the Gathered Leaves Dies. The smaller sprig of leaves, also die cut from the Brushed Metallic CS, is from the Detailed Bands Dies.

The “belt” for the card is a 5-1/2″ x 1-1/2″ strip of Merry Merlot CS with a 5-1/2″ x 1-1/4″ strip of the Plaid Tidings DSP adhered to the top. This strip is then scored 1/2″ from the right. The 1/2″ is adhered to the backside of the inside layer before it is adhered to the card. I used the Gather Together stamp set to stamp the pumpkins and the greeting above and below the “belt” on the inside layer. I’m thrilled with how it came out, I hope you are too!
You have now reached the end of the hop. If you started somewhere in the middle you can go to the beginning by going back to Jo Blackman’s blog or use the list below to see who you missed.
Blog Hop Line-Up:
- Jo Blackman (UK)
- Teri Pocock
- Jean Bolen Beaulieu
- Heidi Collins
- Kim Quade – US
- Kim Lamos
- Tiziana Milano
- Maureen Rauchfuss (US)
- Barbara Welch (US)
- Melissa Thomas
- Steph Jandrow (US)
- Katja Ettig
- Lisa Ann Bernard <—– you are here
If you live in the United States and would like to shop with me you can follow any of the photo links below to get to my online store. When you place your order, don’t forget to use this months Mystery Hostess code – from the bar on the right – to earn this months Customer Appreciation PDF Tutorial (with a qualifying order)!
If you need help with how to use the host code you can find the answer here. If you would like to join me for some classes, clubs or events make sure to visit the events page or sign up for my newsletter so you will never miss out again.
Thank you for visiting please take the time to say hello and leave a comment.
These are the supplies I used:
click on the picture to be taken to my store to purchase
Awesome Deals!
Join My Team – Creative Royalty
Click HERE to learn more and start choosing your kit products!
No Risk! Try out all of the demonstrator discounts and benefits through December 31, 2020. No penalty to drop.
Extend from January through March (and enjoy Sale a Bration and the January – May Mini Catalog 2021) by reaching $300 in sales by December 31, 2020.
Just for You! There’s no obligation to host parties, sell or purchase anything other than the kit. It’s the perfect crafty gift to yourself!

Click here to shop my online store.
Earn my monthly Customer Appreciation PDF Tutorial by placing an order $30 or more (before shipping & tax). This PDF tutorial includes all the instructions to create six adorable cards!
All orders of $30 and above (before tax and shipping) placed in my online store using the Hostess Code U2AUTFB2, will be emailed the Customer Appreciation PDF tutorial within 48 hours.
PLEASE NOTE, if your order is over $150 before tax and shipping DO NOT enter the Hostess Code and you will receive all the Stampin’ rewards you earned on your order AND the Customer Appreciation PDF tutorial.
If you enjoyed this post, please be sure to . . .
- Join me on Monday’s at 2:30 PM (MT) on my Facebook page for Facebook LIVE.
- Receive a FREE PDF tutorial when you subscribe to my monthly newsletter (exclusive offers) & daily blog updates here.
- Earn up to a $45 shopping spree with my Royalty Rewards Program.
- Check out the clearance rack and save up to 70%.
- Save 10% on coordinating product bundles!
- The $99 Starter Kit is the best deal of ALL! Discounts & benefits here.
- Visit my gallery for paper crafting ideas.
- Place a $30 (or more) order and receive my FREE Customer Appreciation PDF Tutorial.
- Join my Online Classes to create some fabulous projects using Stampin’ Up! products with great layouts, fun folds & techniques you won’t want to miss
- Follow me on Pinterest.
- Subscribe to my YouTube paper crafting video tutorials.




Beautiful – I have never made a buckle card – will need to try it!
Beautiful card! I Love learning a new technique! Will definitly have to make this belt buckle card….thanks for sharing
Beautiful card. I love the colors you used.
Great card Lisa Ann … the colours are gorgeous!
Love the colors! I have been meaning to make a buckle card. Thanks for the how to make info!
Super fun card design with a rich color combo! Thanks for sharing!
Lovely card, thank you for sharing x
Your folded card is a really nice idea. Thank you so much for sharing!
Wow, love this fun fold card! Can’t wait to try my hand at it and I always forget about getting the most out of your card stock. Thanks for reminding me again.