
Hi Stampers. Whew, we did it! We got past Christmas. Now it’s time to think about thank you notes. Wow your friends with this beautiful snowflake spinner card.

This spinner card started with a Highland Heather card base, 8-1/2″ x 5-1/2″, scored at 4-1/4″. Next, I adhered a 3-3/4″ x 5″ piece of DSP to a 4″ x 5-1/4″ piece of Pacific Point CS. I placed this onto the cardbase without adhering (or use temporary adhesive) to die cut the circle out of the front of the card. Using the Layering Circle Dies and the Cut & Emboss Machine, I cut the circle though all three layers.

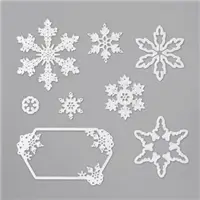
The snowflakes were die cut from Pacific Point, Highland Heather, Purple Posey & Seaside Spray CS using the Snowflake Dies. The two largest ones were adhered together with a piece of fishing line between the two layers. Additional snowflakes were added using glue dots.

I placed the snowflakes in the center of the circle on the card base and adhered the fishing line above and below the circle using Tear & Tape Adhesive. The Pacific Point layer and DSP layers were added to the card front, securing the fishing line between those and the card base.

The snowflake now spins in the center of the circle – hence the name spinner card. You can twist it a few times before you close it and put it in the envelope, so when the recipient opens it, the snowflake spins.

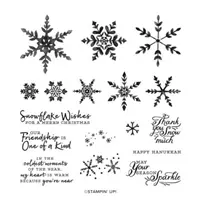
Inside the spinner card is a 4″ x 5-1/4″ layer of Whisper White CS, The sentiment was stamped in the center of this layer using Gorgeous Grape ink and the snowflakes on top and bottom are stamped in Highland Heather and Seaside Spray ink. More detailed instructions can be found in the video below.
Video Tutorial:
(click here to view this video on YouTube)
If you live in the United States and would like to shop with me you can follow any of the photo links below to get to my online store. When you place your order, don’t forget to use this months Mystery Hostess code – from the bar on the right – to earn this months Customer Appreciation PDF Tutorial (with a qualifying order)! If you need help with how to use the host code you can find the answer here.
If you would like to join me for some classes, clubs or events make sure to visit the events page or sign up for my newsletter so you will never miss out again.
Thank you for visiting please take the time to say hello and leave a comment.
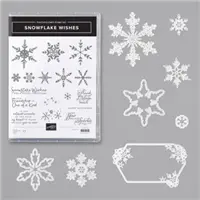
These are the supplies I used:
click on the picture to be taken to my store to purchase


Awesome Deals!


Join My Team – Creative Royalty
Click HERE to learn more and start choosing your kit products! No Risk! Try out all of the demonstrator discounts and benefits through March 31, 2021. No penalty to drop. Extend from April through June (and you can order from the new 2021 Annual Catalog early) by reaching $300 in sales by March 31, 2021. Just for You! There’s no obligation to host parties, sell or purchase anything other than the kit. It’s the perfect crafty gift to yourself!
Earn my monthly Customer Appreciation PDF Tutorial by placing an order $30 or more (before shipping & tax). This PDF tutorial includes all the instructions to create six adorable cards! All orders of $30 and above (before tax and shipping) placed in my online store using the Hostess Code 2AFF2GFU, will be emailed the Customer Appreciation PDF tutorial.
PLEASE NOTE, if your order is over $150 before tax and shipping DO NOT enter the Hostess Code and you will receive all the Stampin’ Rewards you earned on your order AND the Customer Appreciation PDF tutorial.
If you enjoyed this post, please be sure to . . .
- Join me on Monday’s at 2:30 PM (MT) on my Facebook page for Facebook LIVE.
- Receive a FREE PDF tutorial when you subscribe to my monthly newsletter (exclusive offers) & daily blog updates here.
- Earn up to a $45 shopping spree with my Royalty Rewards Program.
- Check out the clearance rack and save up to 70%.
- Save 10% on coordinating product bundles!
- The $99 Starter Kit is the best deal of ALL! Discounts & benefits here.
- Visit my gallery for paper crafting ideas.
- Place a $30 (or more) order and receive my FREE Customer Appreciation PDF Tutorial.
- Join my Online Classes to create some fabulous projects using Stampin’ Up! products with great layouts, fun folds & techniques you won’t want to miss
- Follow me on Pinterest.
- Subscribe to my YouTube paper crafting video tutorials.


Trackbacks/Pingbacks