
Hi Stampers! One of my most popular pins was a Christmas card featuring the Twist & Pop design. Today, I’m excited to share a birthday version of this fun fold, using the Counting Sheep stamp set and coordinating Sheep Dies. Both of these are Level 1 items from the Mid-Year Sale-A-Bration brochure.

Isn’t this Twist & Pop Birthday Card fun?!?!

The card base is Pacific Point, and next comes a layer of Daffodil Delight, followed by a layer of Basic White cardstock. For the Basic White layer, I used Blending Brushes to add Balmy Blue, Soft Suede, and Garden Green ink to create a lovely background for the outside of the card.

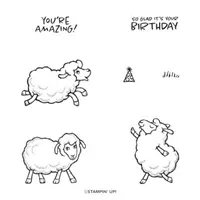
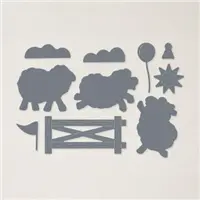
Using the Counting Sheep stamp set, I stamped the sentiment and the sheep in Basic Gray ink, then brought the sheep to life with Stampin’ Blends. I used the Sheep Dies to cut out the sheep, fence (in Soft Suede cardstock), and sun (in Daffodil Delight cardstock). I attached the fence with Mini Glue Dots, and added the sheep and sun with Stampin’ Dimensionals for a little extra pop.

The mechanism for my Twist & Pop Birthday card may seem tricky, but it’s actually not that difficult! Once you follow along with the video, you’ll see how simple it is to put together. It’s made from two pieces of Pacific Point cardstock and is the only slightly challenging part of the whole card.

The middle panels each feature a layer of Daffodil Delight cardstock, topped with Basic White cardstock that showcases the stamped images.

You can see in the photo how I’ve lightened the sheep on the right by lifting some of the color. I still need to go back and do the same for the other sheep, as this was taken before I had a chance to finish.

In this close-up, you can see how I used the Light Pool Party Stampin’ Blend to add a soft accent around the edges. Once the Color Lifter is applied, the effect will become even more subtle, showing exactly why the Color Lifter is a must-have tool!
Twist & Pop Birthday Card Video Tutorial:
If you live in the United States and would like to shop with me you can follow any of the photo links below to get to my online store. When you place your order, don’t forget to use this months Mystery Hostess code – from the bar on the right – to earn this months Customer Appreciation PDF Tutorial (with a qualifying order)! If you need help with how to use the host code you can find the answer here.
If you would like to join me for some classes, clubs or events make sure to visit the events page or sign up for my newsletter so you will never miss out again.
Thank you for visiting please take the time to say hello and leave a comment.
These are the supplies I used:
click on the picture to be taken to my store to purchase


Awesome Deals!


Earn my monthly Customer Appreciation PDF Tutorial by placing an order $30 or more (before shipping & tax). This months PDF tutorial includes all the instructions for 24 One Sheet Wonders! All orders of $30 and above (before tax and shipping) placed in my online store using the Hostess Code 6AYMZDTE, will be emailed the Customer Appreciation PDF tutorial.
PLEASE NOTE, if your order is over $150 before tax and shipping DO NOT enter the Hostess Code and you will receive all the Stampin’ Rewards you earned on your order AND the Customer Appreciation PDF tutorial.


Very cute card!
LOVE THE CARD. i HAVE A DIE THAT MAKES THE Mechanism but this is so much easier. I’m going to try it.
Hi Lisa I love your card but no way can I get the inside right I got the front but in back hangs over or I get a scored line in the front on the piece that hangs down on my mountain side and. The back is very messy and won’t go flat it must be something I am doing wrong. Can you show me or tell me do the score lines go to the inside on the back? I will practise more. I thought maybe my centre for my x wasn’t centred so I made a new one but still the same thing happens thanks for your help
Hi Carolyn, I sent you an email last week, but I have not heard back from you. I’d love to connect with you over zoom so we can get this to work for you.
Hi there thanks so much I have been trying and almost there but no way I am home tomorrow am if we can do that would be wonderful no caps in my email ok. Thanks so much not sure how much time difference we are but I am eastern Ca nada ok
I tried emailing again. If you don’t get it. Please email me. There is a link on the side bar on the right.